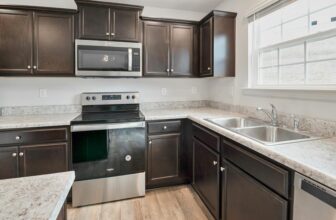
Installing a wall oven might seem daunting, but with the right knowledge and preparation, you can make an informed decision about whether to tackle it yourself or hire a professional. Before diving into the installation process, it’s crucial to understand all your options – check out our comprehensive wall oven buying guide to ensure you’ve selected the perfect model for your kitchen.
Understanding Installation Requirements
Wall oven installation involves several critical components that determine whether you can handle the project yourself. Most wall ovens require a dedicated 240V electrical circuit, which is significantly different from standard household outlets. This high-voltage requirement exists because wall ovens typically draw between 20-50 amps of electricity during operation.
Electrical Requirements:
- Dedicated 240V circuit with appropriate amperage
- NEMA 14-50 or similar outlet configuration
- Proper grounding and circuit protection
- Compliance with local electrical codes
Cabinet Specifications:
- Precise cutout dimensions (typically 24″, 27″, or 30″ wide)
- Adequate depth clearance (usually 22-25 inches)
- Proper ventilation space around the unit
- Structural support for the oven’s weight (60-150 pounds)
Building Code Compliance: Most jurisdictions require permits for electrical work, and some mandate professional installation for safety reasons. According to the UK’s Institute of Engineering and Technology, electrical work in kitchens must comply with BS 7671 wiring regulations, which often requires certified electrician involvement.
DIY Installation: When It’s Possible
DIY installation becomes feasible when specific conditions are met. If you have existing compatible electrical connections and the cabinet space fits perfectly, you might be able to handle the installation yourself.
Ideal DIY Scenarios:
- Replacing an existing wall oven with identical dimensions
- Existing 240V outlet in correct location
- No cabinet modifications required
- Local codes permit homeowner installation
- You have experience with appliance installation
Tools You’ll Need:
- Electrical tester/multimeter
- Drill with various bits
- Level and measuring tape
- Screwdrivers and socket set
- Wire strippers (if minor electrical work needed)
- Safety equipment (gloves, safety glasses)
The DIY route typically saves £200-500 in installation costs, but requires careful attention to safety and code compliance. Many homeowners successfully install wall ovens themselves, particularly when replacing existing units.
Professional Installation: When It’s Necessary
Professional installation becomes essential when electrical work is required or when warranty conditions mandate certified installation. Many manufacturers void warranties if installation isn’t performed by qualified technicians.
Situations Requiring Professional Installation:
- New electrical circuit installation
- Cabinet modifications or structural changes
- Complex electrical configurations
- Warranty requirements specify professional installation
- Local building codes mandate certified work
- Gas line connections (for gas wall ovens)
Professional installers bring expertise, proper tools, and insurance coverage. They ensure code compliance and can handle unexpected complications that might arise during installation.
Step-by-Step DIY Installation Process
Phase 1: Preparation
- Power Off: Turn off electricity at the circuit breaker
- Verify Disconnection: Use electrical tester to confirm power is off
- Measure Twice: Confirm new oven dimensions match existing space
- Clear Workspace: Remove old oven and clean installation area
Phase 2: Electrical Connection
- Inspect Wiring: Check existing electrical connections for damage
- Match Specifications: Ensure outlet matches oven requirements
- Test Voltage: Verify 240V supply with multimeter
- Connect Safely: Follow manufacturer’s wiring diagram exactly
Phase 3: Physical Installation
- Prepare Cabinet: Ensure proper ventilation and support
- Position Oven: Carefully slide unit into cabinet opening
- Secure Mounting: Attach mounting brackets per instructions
- Level Unit: Adjust feet to ensure oven sits level
- Test Operation: Verify all functions work properly
Phase 4: Final Inspection
- Safety Check: Ensure all connections are secure
- Ventilation Verification: Confirm adequate airflow around unit
- Door Operation: Test door alignment and seal
- Function Test: Run complete operational test
Cost Comparison: DIY vs Professional
DIY Installation Costs:
- Tools (if needed): £50-150
- Permits (if required): £100-200
- Time investment: 4-8 hours
- Total DIY Cost: £150-350
Professional Installation Costs:
- Basic installation: £200-400
- Electrical work: £300-600
- Cabinet modifications: £400-800
- Permits and inspections: £100-300
- Total Professional Cost: £500-1,200
The cost difference can be substantial, but professional installation includes warranty coverage, code compliance assurance, and expertise handling complications.
Common Installation Mistakes to Avoid
Electrical Errors:
- Using wrong wire gauge for amperage
- Improper grounding connections
- Incorrect outlet configuration
- Skipping electrical testing
Physical Installation Problems:
- Inadequate ventilation clearances
- Improper mounting bracket installation
- Ignoring manufacturer’s spacing requirements
- Poor cabinet support preparation
Code Compliance Issues:
- Skipping required permits
- Non-compliant electrical work
- Inadequate safety measures
- Improper documentation
Safety Considerations
Wall oven installation involves significant safety risks, particularly electrical hazards. Always prioritize safety over cost savings.
Critical Safety Measures:
- Never work on live electrical circuits
- Use proper personal protective equipment
- Follow manufacturer instructions exactly
- Don’t exceed your skill level
- Know when to call professionals
According to the Electrical Safety Foundation International, electrical accidents during DIY projects often result from overconfidence and inadequate safety precautions.
Final Verdict
DIY installation can be rewarding and cost-effective for experienced homeowners with existing compatible electrical connections. However, professional installation provides peace of mind, warranty protection, and code compliance assurance.
Choose DIY If:
- You have electrical experience
- Existing connections are compatible
- Local codes permit homeowner work
- You’re comfortable with the risks
Choose Professional If:
- Electrical work is required
- Warranty mandates professional installation
- You lack experience or confidence
- Local codes require certified work
Remember that cutting corners on installation can lead to safety hazards, warranty voidance, and potential insurance issues. The investment in proper installation protects both your safety and your appliance investment for years to come.