After investing in quality equipment from the ultimate guide to slingshots, maintaining peak performance requires understanding when and how to replace your bands. Most slingshot bands need replacement every 300-500 shots, but recognizing the warning signs and mastering the replacement process will keep your equipment performing at its best.
Tiny Cuts or Nicks: Small cuts at the fork attachment points indicate stress concentration that will soon lead to band failure. Replace immediately when you notice these.
Discoloration: Bands that change color (usually becoming lighter or developing white stress marks) are showing material fatigue and should be replaced.
Stretching Inconsistencies: When one side of your band stretches differently than the other, accuracy suffers dramatically. This asymmetry is a clear replacement signal.
Surface Cracking: Any visible cracks in the band material, no matter how small, indicate imminent failure.
Performance Indicators
Reduced Velocity: If your shots are noticeably slower despite proper technique, your bands have lost elasticity and need replacement.
Inconsistent Grouping: When your accuracy suddenly deteriorates despite consistent form, worn bands are often the culprit.
Draw Weight Changes: Bands that feel either much easier or much harder to draw than normal have changed properties and should be replaced.
Safety Concerns
Never continue using bands that show any signs of impending failure. Band breakage during draw can cause serious injury, and the performance degradation will harm your shooting progress. When in doubt, replace the bands – they’re inexpensive compared to the potential consequences of failure.
Band Lifespan: What to Expect
Typical Lifespan by Usage
Casual Shooting (1-2 sessions per week): 2-3 months Regular Practice (3-4 sessions per week): 4-6 weeks Intensive Training (daily practice): 2-3 weeks Competition Use (high-stress shooting): 1-2 weeks
Factors Affecting Lifespan
Temperature Extremes: Both hot and cold weather accelerate band degradation. Avoid leaving slingshots in cars or extreme temperatures.
Draw Length: Longer draws create more stress and reduce band life. Optimize your draw length for both performance and longevity.
Storage Conditions: UV exposure, humidity, and chemical exposure all impact band materials. Proper storage significantly extends life.
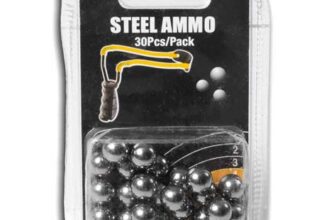
Ammunition Type: Heavier projectiles and higher velocities increase band stress. Match your band setup to your intended use to maximize lifespan.
Tools and Materials Needed
Essential Tools
Sharp knife or scissors
Needle-nose pliers
Ruler or measuring tape
Permanent marker
Small file (for fork preparation)
Optional but Helpful
Band jig or alignment tool
Heat gun or hair dryer
Rubber cement or band adhesive
Replacement pouches
Replacement Bands
Always buy bands from reputable suppliers. Quality varies dramatically between manufacturers, and cheap bands often fail prematurely. Stock up on replacement bands when you find ones that work well with your shooting style.
Step-by-Step Replacement Process
Pre-Replacement Preparation
Document Current Setup: Measure band length, width, and attachment method before removal
Clean Fork Tips: Remove any residue from previous bands
Inspect Fork: Check for damage or rough edges that could damage new bands
Gather Materials: Have all tools and replacement bands ready
Universal Removal Steps
Relieve Tension: Ensure bands are completely relaxed
Cut Old Bands: Cut bands near the fork attachment, not at the pouch
Remove Attachments: Carefully remove any clips, clamps, or tie-on materials
Clean Surfaces: Remove all adhesive residue and debris from fork tips
Measuring New Bands
Active Length: Measure from fork tip to fork tip when bands are relaxed Taper Ratio: Note if bands narrow toward the pouch end Thickness: Ensure consistent thickness throughout the band length
Proper measurements ensure your new bands will perform identically to your previous setup, maintaining the muscle memory you’ve developed through practice.
Flat Band Replacement Method
Fork Attachment Options
Over-the-Top (OTT) Method:
Position band over the fork tip
Wrap band around fork 2-3 times
Secure with rubber band or clip
Trim excess material
Through-the-Fork (TTF) Method:
Thread band through fork slot
Fold band back on itself
Secure fold with clip or adhesive
Ensure equal tension on both sides
Pouch Attachment
Tie-On Method:
Cut small holes in pouch edges
Thread band through holes
Tie secure knots
Test knot strength before shooting
Clamp Method:
Fold band end over pouch edge
Secure with specialized clamp
Ensure even pressure distribution
Check clamp tightness regularly
Flat Band Advantages
Flat bands typically provide higher velocity and smoother draw cycles, making them popular for target shooting and hunting applications. However, they require more precise installation and may be less forgiving of installation errors.
Tube Band Replacement Method
Preparation Steps
Measure Tube Length: Cut tubes 10-15% longer than flat band equivalent
Prepare Pouches: Many tube systems use integrated pouches
Check Tube Condition: Ensure tubes are round and consistent
Tube bands generally last longer than flat bands and perform more consistently in adverse weather. They’re often easier for beginners to install and maintain, making them excellent choices for avoiding common shooting mistakes.
Extending Band Life: Pro Tips
Proper Storage Techniques
Temperature Control: Store slingshots in moderate temperatures (60-75°F) UV Protection: Keep bands away from direct sunlight when not in use Humidity Management: Avoid extremely dry or humid storage areas Stress Relief: Store slingshots with bands relaxed, not under tension
Usage Best Practices
Warm-Up Routine: Stretch bands gently before intensive shooting sessions Draw Discipline: Avoid overdrawing bands beyond their optimal length Rotation System: Use multiple band sets and rotate between them Cleaning Protocol: Wipe bands clean after each session
Environmental Considerations
Weather Awareness: Cold weather makes bands brittle; hot weather accelerates degradation Ammunition Selection: Match projectile weight to band capacity to avoid overstressing Shooting Frequency: Allow bands to rest between intensive sessions when possible
According to Scientific Rubber Technology research, proper storage and usage can extend band life by up to 50% compared to neglected equipment.
Troubleshooting Common Issues
Uneven Band Tension
Symptom: Shots consistently pull to one side Solution: Check band attachment points for equal tension and positioning
Premature Band Failure
Symptom: Bands breaking well before expected lifespan Solutions:
Symptom: Bands wearing primarily at fork attachment Solutions:
File fork tips smooth
Rotate bands periodically
Consider fork tip protectors
Band Storage and Care
Proper Storage Environment
Store replacement bands in cool, dark, dry conditions. Original packaging often provides excellent protection from UV and ozone exposure.
Inventory Management
Keep track of band installation dates and shot counts to predict replacement needs. Many serious shooters maintain logs of band performance to identify the best brands and configurations.
Bulk Purchasing Advantages
Buying bands in bulk often provides better value and ensures consistency between replacements. However, avoid buying more than a year’s supply, as latex degrades over time even in storage.
Conclusion
Regular band replacement is essential for maintaining peak slingshot performance and safety. By recognizing the warning signs, mastering the replacement process, and following proper care procedures, you’ll keep your equipment performing at its best while maximizing band lifespan.
Remember that quality bands are an investment in your shooting accuracy and safety. Don’t compromise on band quality to save a few pounds – the performance difference is dramatic and the safety implications are serious.
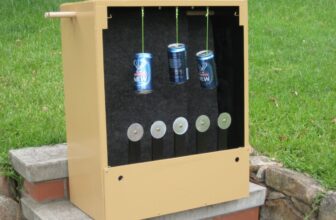
For shooters interested in maximizing their practice effectiveness, combining proper band maintenance with quality DIY target setups ensures every practice session contributes to skill development. When bands are performing optimally, you can focus on technique improvement rather than equipment limitations.
Whether you’re shooting for recreation, competition, or hunting, proper band maintenance keeps your slingshot ready for peak performance when it matters most.
We use cookies to ensure that we give you the best experience on our website. If you continue to use this site we will assume that you are happy with it.Ok


")